Quickstart: Producing Videos with AnswerStage in Minutes
🎓 AnswerStage Onboarding
A practical reference for new clients to get started making great videos quickly.
🌟 Introduction: Philosophy, Goals & Use Cases
AnswerStage was built on the belief that real voices and authentic stories are more powerful than scripted marketing. In an age of AI-generated content and faceless promotion, what stands out is humanity — faces, voices, perspectives, and passion.
🧠 The Core Concept:
Enable anyone — whether it’s a marketer, speaker, employee, or volunteer — to easily record and share video responses to thoughtfully crafted questions. These clips are then instantly branded and formatted for professional use on social media, websites, email campaigns, and beyond.
🎯 The Goal:
Make it frictionless for organizations to capture short, relevant, personal video content — and repurpose it across multiple channels to build trust, engagement, and visibility.
💡 Common Use Cases:
-
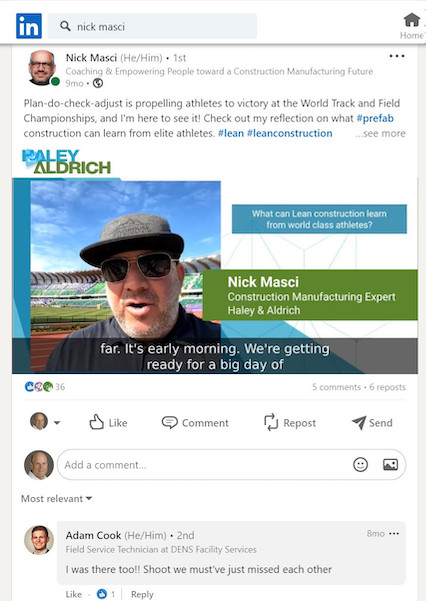
Event Promotion: Speakers previewing what they’ll cover at an upcoming conference.
-
Client Testimonials: Capturing how a service or nonprofit has impacted individuals.
-
Thought Leadership: Internal experts commenting on trends or industry developments.
-
Employee Spotlights: HR or marketing showcasing team culture and talent.
-
Volunteer and Donor Stories: Sharing motivations and impact for fundraising.
Whether you’re in tech, healthcare, education, or community services — if you’re telling stories, AnswerStage makes it easier, faster, and better looking.
🛠️ Step-by-Step Guide
1. Branding Setup: Set It and Forget It
This is the very first step. AnswerStage is designed to look professional out of the box — but to match your specific brand identity, a few one-time customizations ensure every video aligns with your look and feel.
Configure:
-
Colors, Fonts & Animations: Select visual themes that match your brand.
-
Intro/Outro Styles: Optional animated bookends for each video.
-
Video Orientation Defaults:
-
Square – Ideal for LinkedIn or websites
-
Vertical – Best for TikTok or Instagram Reels
-
Horizontal – Great for YouTube or embedded use
-
-
Custom Background Image (optional): Light, non-busy backgrounds work best.
-
Landing Page Branding: When recipients click to record, they’re welcomed with a branded, customized landing page that includes your colors, a header image, and guidance text.
📝 Once set, this branding applies across all future videos — saving time and maintaining consistency.
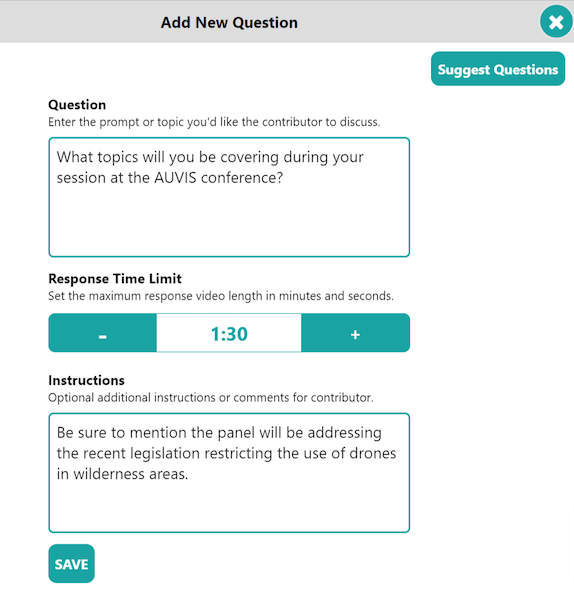
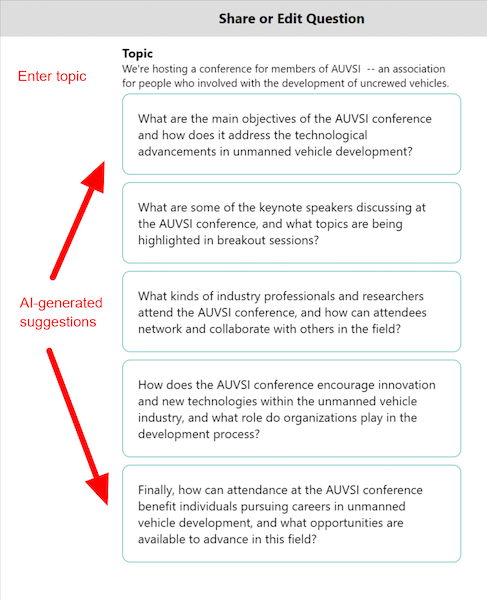
2. Create Questions or Prompts
This is where content starts. You determine what you want people to talk about.
Options:
-
Ask a direct question: “What inspired you to volunteer with us?”
-
Use a directive: “List three ways our program has helped your career.”
-
Add coaching tips: e.g., “Be sure to mention the April 25th event.”
-
Set a time limit (default: 2 minutes; adjust up or down if needed).
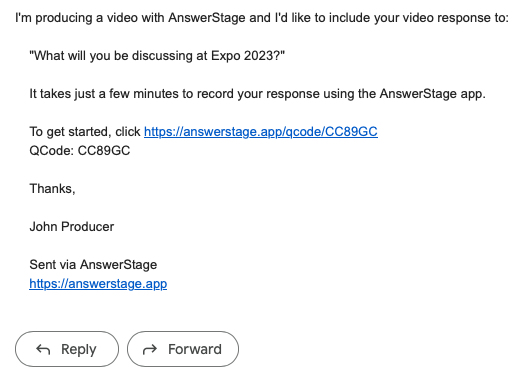
Each prompt generates a unique URL you can send via email, SMS, or even embed on a webpage.
3. Send Links and Collect Responses
-
Recipients use their phone or computer to record a video.
-
No login or download is required — just click, record, submit.
-
All submissions are automatically routed to the Responses tab in your dashboard.
4. Review and Refine Responses
Each response can be reviewed and lightly edited before it becomes part of a final video.
Tasks:
-
Trim start/end to remove delays or stumbles.
-
Review transcription for accuracy (captions are auto-generated).
-
Correct display name/title if needed.
-
Reword prompt if the original text doesn’t perfectly match the intended question.
✅ Clients maintain full control before anything gets published.
5. Assemble Videos in the Studio
The “Studio” is where you bring it all together.
Key Actions:
-
Combine one or multiple responses.
-
Choose a design template and video format.
-
Add or remove captions, music, and intros/outros.
-
Click “Create AnswerStage Video” — the system generates a professional, share-ready video in minutes.
📦 Think of each response as a modular building block — you can use it solo or alongside others in sequence.
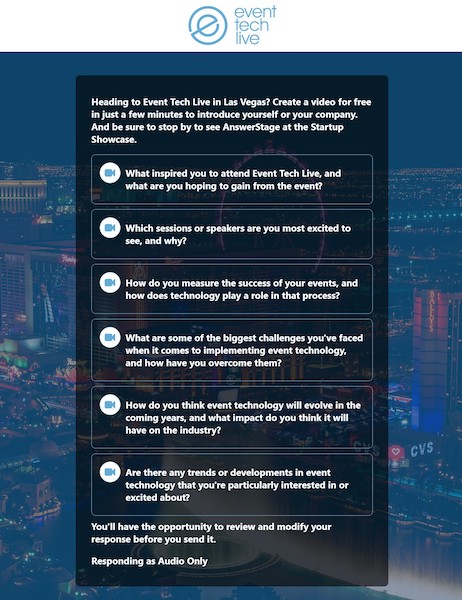
6. Use Multi-Question Interviews (Optional)
Rather than one question per link, you can group multiple prompts into a single experience.
-
Respondents see all questions at once.
-
Ideal for longer-form content, such as featured interviews or panel-like sequences.
-
Saves time for the respondent and gives you richer material.
7. Share and Repurpose
Completed videos appear in your Gallery with tools to:
-
Copy a direct link
-
Download the video
-
Share on social platforms (LinkedIn, Facebook, Instagram, YouTube, etc.)
Encourage your contributors to share on their own networks — increasing reach and credibility.
8. Test Freely — No Risk
-
All videos and responses are private by default.
-
Clients are encouraged to:
-
Record test answers.
-
Experiment with styles and sequences.
-
Explore the system freely — there’s no per-video charge or penalty for testing.
-